Kotlin, FireBase 채팅어플 만들기 -1- [Splash] (tistory.com)
Kotlin, FireBase 채팅어플 만들기 -2- [Login] (tistory.com)
Kotlin, FireBase 채팅어플 만들기 -3- [Sign Up] (tistory.com)
Kotlin, FireBase 채팅어플 만들기 -4- [Bottom Navigation] (tistory.com)
Kotlin, FireBase 채팅어플 만들기 -5- [친구창_fragment] (tistory.com)
Kotlin, FireBase 채팅어플 만들기 -6- [채팅 리스트_fragment] (tistory.com)
Kotlin, FireBase 채팅어플 만들기 -7- [프로필 변경_fragment] (tistory.com)
Kotlin, FireBase 채팅어플 만들기 -8- [채팅창_activity] (tistory.com)
[전체 코드 깃허브 주소]
LasBe-code/LasbeTalk (github.com)
[참고]
GitHub - LasBe-code/LasbeTalk
Contribute to LasBe-code/LasbeTalk development by creating an account on GitHub.
github.com
[XML]
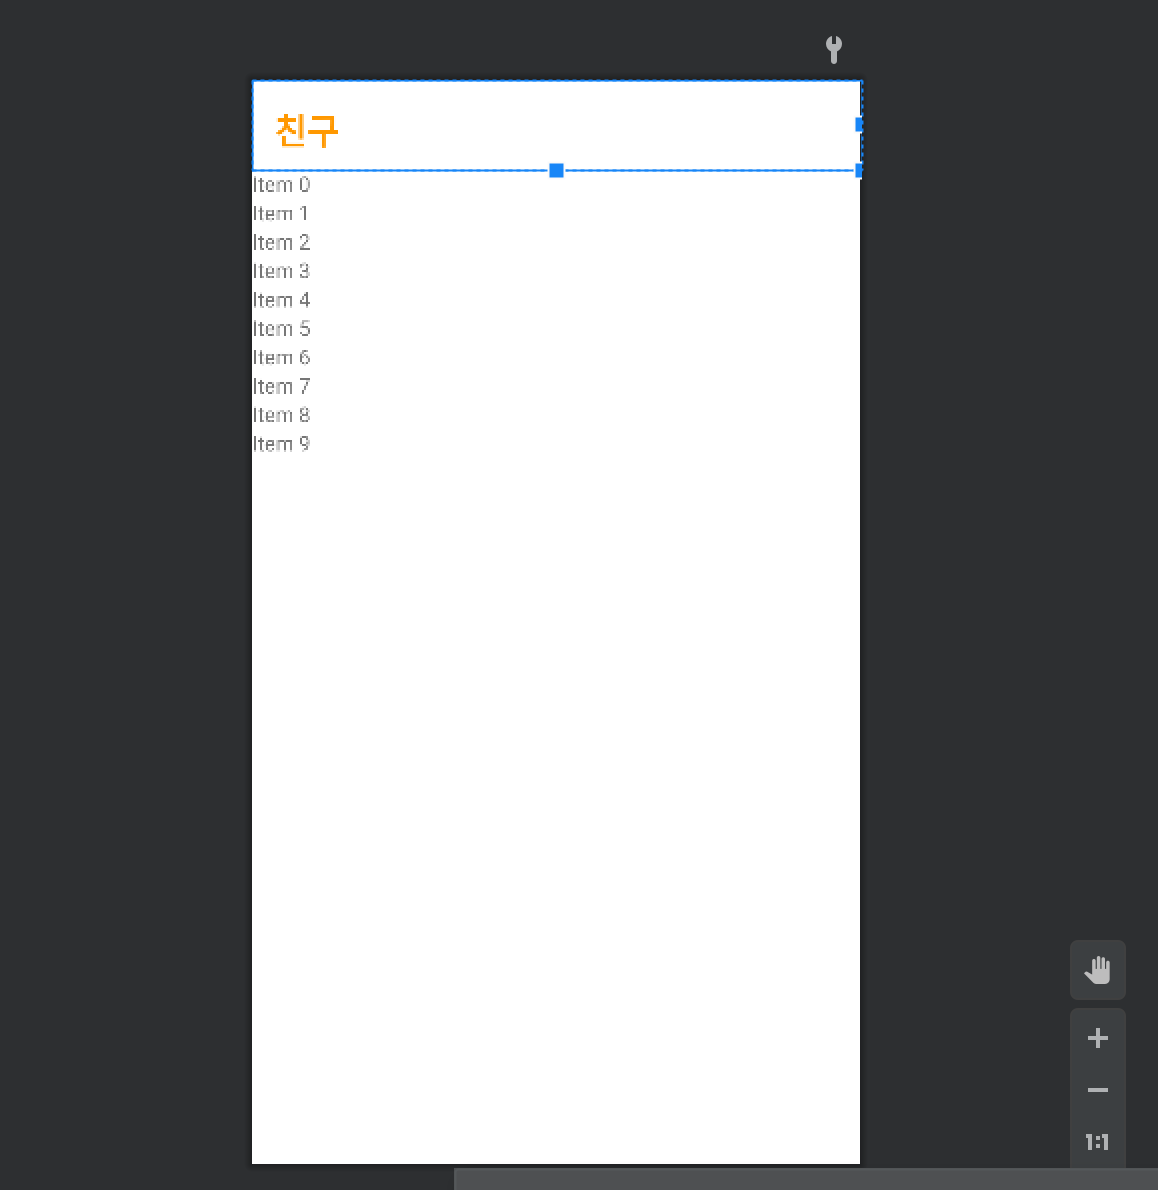
<fragment_home.xml>
<?xml version="1.0" encoding="utf-8"?>
<LinearLayout xmlns:android="http://schemas.android.com/apk/res/android"
    xmlns:tools="http://schemas.android.com/tools"
    android:layout_width="match_parent"
    android:layout_height="match_parent"
    android:background="#FFFFFF"
    android:orientation="vertical"
    tools:context=".fragment.HomeFragment">

    <LinearLayout
        android:layout_width="match_parent"
        android:layout_height="60dp"
        android:orientation="horizontal">

        <TextView
            android:layout_width="wrap_content"
            android:layout_height="wrap_content"
            android:layout_gravity="bottom"
            android:layout_marginLeft="15dp"
            android:layout_marginBottom="5dp"
            android:fontFamily="cursive"
            android:text="친구"
            android:textColor="@color/lasbeOrange"
            android:textSize="24sp"
            android:textStyle="bold" />
    </LinearLayout>

    <androidx.recyclerview.widget.RecyclerView
        android:id="@+id/home_recycler"
        android:layout_width="match_parent"
        android:layout_height="match_parent" />

</LinearLayout>
<item_home>
<?xml version="1.0" encoding="utf-8"?>
<androidx.constraintlayout.widget.ConstraintLayout xmlns:android="http://schemas.android.com/apk/res/android"
    xmlns:app="http://schemas.android.com/apk/res-auto"
    xmlns:tools="http://schemas.android.com/tools"
    android:layout_width="match_parent"
    android:layout_height="wrap_content"
    android:background="#FFFFFF"
    android:orientation="horizontal">

    <androidx.constraintlayout.widget.ConstraintLayout
        android:layout_width="match_parent"
        android:layout_height="wrap_content"
        android:layout_marginTop="4dp"
        android:background="#FFFFFF"
        app:layout_constraintBottom_toBottomOf="parent"
        app:layout_constraintEnd_toEndOf="parent"
        app:layout_constraintStart_toStartOf="parent"
        app:layout_constraintTop_toTopOf="parent">

        <ImageView
            android:id="@+id/home_item_iv"
            android:layout_width="60dp"
            android:layout_height="60dp"
            android:layout_marginStart="15dp"
            android:layout_marginLeft="15dp"
            android:layout_marginTop="4dp"
            android:layout_marginBottom="4dp"
            android:src="@drawable/user"
            app:layout_constraintBottom_toBottomOf="parent"
            app:layout_constraintStart_toStartOf="parent"
            app:layout_constraintTop_toTopOf="parent" />

        <TextView
            android:id="@+id/home_item_tv"
            android:layout_width="wrap_content"
            android:layout_height="wrap_content"
            android:layout_gravity="center_vertical"
            android:layout_marginStart="24dp"
            android:layout_marginLeft="24dp"
            android:layout_marginTop="4dp"
            android:text="이름"
            android:textColor="#000000"
            android:textSize="20sp"
            android:textStyle="bold"
            app:layout_constraintBottom_toTopOf="@+id/home_item_email"
            app:layout_constraintStart_toEndOf="@+id/home_item_iv"
            app:layout_constraintTop_toTopOf="@+id/home_item_iv" />

        <TextView
            android:id="@+id/home_item_email"
            android:layout_width="wrap_content"
            android:layout_height="wrap_content"
            android:layout_marginStart="25dp"
            android:layout_marginLeft="26dp"
            android:layout_marginTop="6dp"
            android:text="이메일"
            android:textColor="#8A252525"
            app:layout_constraintBottom_toBottomOf="@+id/home_item_iv"
            app:layout_constraintStart_toEndOf="@+id/home_item_iv"
            app:layout_constraintTop_toBottomOf="@+id/home_item_tv" />

    </androidx.constraintlayout.widget.ConstraintLayout>


</androidx.constraintlayout.widget.ConstraintLayout>
[데이터 모델]
package com.example.lasbetalk.model

data class Friend(
    var email : String? = null,
    var name : String? = null,
    var profileImageUrl : String? = null,
    var uid : String? = null)
정보를 담을 모델의 이름을 Friend로 정의했다.
[액티비티 or 프래그먼트]
class HomeFragment : Fragment() {
    companion object{
        fun newInstance() : HomeFragment {
            return HomeFragment()
        }
    }

    private lateinit var database: DatabaseReference
    private var friend : ArrayList<Friend> = arrayListOf()

    //메모리에 올라갔을 때
    override fun onCreate(savedInstanceState: Bundle?) {
        super.onCreate(savedInstanceState)

    }

    //프레그먼트를 포함하고 있는 액티비티에 붙었을 때
    override fun onAttach(context: Context) {
        super.onAttach(context)
    }

    //뷰가 생성되었을 때
    //프레그먼트와 레이아웃을 연결시켜주는 부분
    @SuppressLint("UseRequireInsteadOfGet")
    override fun onCreateView(inflater: LayoutInflater,
                              container: ViewGroup?,
                              savedInstanceState: Bundle?): View? {

        database = Firebase.database.reference
        val view = inflater.inflate(R.layout.fragment_home, container, false)
        val recyclerView = view.findViewById<RecyclerView>(R.id.home_recycler)
        recyclerView.layoutManager = LinearLayoutManager(requireContext())
        recyclerView.adapter = RecyclerViewAdapter()


//      val recyclerView : RecyclerView = view!!.findViewById<RecyclerView>(R.id.home_recycler)
//      recyclerView.adapter = RecyclerViewAdapter()
//      recyclerView.layoutManager = LinearLayoutManager(inflater.context) //this는 액티비티에서 사용가능 inflater.context는 됨

        return view
    }

    inner class RecyclerViewAdapter : RecyclerView.Adapter<RecyclerViewAdapter.CustomViewHolder>() {

        init {
            val myUid = Firebase.auth.currentUser?.uid.toString()
            FirebaseDatabase.getInstance().reference.child("users").addValueEventListener(object : ValueEventListener {
                override fun onCancelled(error: DatabaseError) {
                }
                override fun onDataChange(snapshot: DataSnapshot) {
                    friend.clear()
                    for(data in snapshot.children){
                        val item = data.getValue<Friend>()
                        if(item?.uid.equals(myUid)) { continue } // 본인은 친구창에서 제외
                        friend.add(item!!)
                    }
                    notifyDataSetChanged()
                }
            })
        }
        override fun onCreateViewHolder(parent: ViewGroup, viewType: Int): CustomViewHolder {
            return CustomViewHolder(LayoutInflater.from(context).inflate(R.layout.item_home, parent, false))
        }

        inner class CustomViewHolder(itemView: View) : RecyclerView.ViewHolder(itemView) {
            val imageView: ImageView = itemView.findViewById(R.id.home_item_iv)
            val textView : TextView = itemView.findViewById(R.id.home_item_tv)
            val textViewEmail : TextView = itemView.findViewById(R.id.home_item_email)
        }

        override fun onBindViewHolder(holder: CustomViewHolder, position: Int) {
            Glide.with(holder.itemView.context).load(friend[position].profileImageUrl)
                .apply(RequestOptions().circleCrop())
                .into(holder.imageView)
            holder.textView.text = friend[position].name
            holder.textViewEmail.text = friend[position].email

            holder.itemView.setOnClickListener{
                val intent = Intent(context, MessageActivity::class.java)
                intent.putExtra("destinationUid", friend[position].uid)
                context?.startActivity(intent)
            }
        }

        override fun getItemCount(): Int {
            return friend.size
        }
    }
}
친구들의 정보를 뿌려주기 위해 리사이클러뷰를 사용했다.
리사이클러뷰 어댑터는 본문 안에 넣어서 작성하였다.
	override fun onCreateView(inflater: LayoutInflater,
                              container: ViewGroup?,
                              savedInstanceState: Bundle?): View? {

        database = Firebase.database.reference
        val view = inflater.inflate(R.layout.fragment_home, container, false)
        val recyclerView = view.findViewById<RecyclerView>(R.id.home_recycler)
        recyclerView.layoutManager = LinearLayoutManager(requireContext())
        recyclerView.adapter = RecyclerViewAdapter()

//      val recyclerView : RecyclerView = view!!.findViewById<RecyclerView>(R.id.home_recycler)
//      recyclerView.adapter = RecyclerViewAdapter()
//      recyclerView.layoutManager = LinearLayoutManager(inflater.context) //this는 액티비티에서 사용가능 inflater.context는 됨

        return view
    }
리사이클러뷰를 선언한 뒤
LinearLayoutManager로 형태를 잡아주고 어댑터를 연결해준다.
recyclerView.layoutManager = LinearLayoutManager(requireContext())액티비티 내에선 LinearLayoutManager(this)로 사용이 가능한데 프래그먼트에서는 this를 사용하면 오류가 난다.
액티비티의 this는 android.content.Context로부터 상속받은 클래스이고
프래그먼트의 this는 java.lang.Object로부터 상속받은 클래스이기 때문에 context와 전혀 상관이 없기 때문이다.
때문에 requireContext()로 프래그먼트의 context를 받아와야 한다.
[reference]
Fragment에서 Context, findViewById() 사용하기 (velog.io)
Fragment에서 Context, findViewById() 사용하기
Fragment 기본 사용
velog.io
어댑터를 불러올 시 친구들의 정보를 담아오는 코드가 자바에선 아래와 같이 어댑터 안에 한번 더 선언해서 사용하면 됐지만
코틀린은 간단하게 init {} 안에 작성해주면 되었다.
///////////////////////////////코틀린///////////////////////////////////////
inner class RecyclerViewAdapter : RecyclerView.Adapter<RecyclerViewAdapter.CustomViewHolder>() {

    init {
        val myUid = Firebase.auth.currentUser?.uid.toString()
        FirebaseDatabase.getInstance().reference.child("users").addValueEventListener(object : ValueEventListener {
            override fun onCancelled(error: DatabaseError) {
            }
            override fun onDataChange(snapshot: DataSnapshot) {
                friend.clear()
                for(data in snapshot.children){
                    val item = data.getValue<Friend>()
                    if(item?.uid.equals(myUid)) { continue } // 본인은 친구창에서 제외
                    friend.add(item!!)
                }
                notifyDataSetChanged()
            }
        })
    }
//////////////////////////////////////////////////////////////////////////////////////

/////////////////////////////자바///////////////////////////////////
class PeopleFragmentRecyclerViewAdapter extends RecyclerView.Adapter<RecyclerView.ViewHolder> {

    List<UserModel> userModels;

    public PeopleFragmentRecyclerViewAdapter() {
        userModels = new ArrayList<>();
        FirebaseDatabase.getInstance().getReference().child("users").addValueEventListener(new ValueEventListener() {
            @Override
            public void onDataChange(DataSnapshot dataSnapshot) {
                userModels.clear();
                for(DataSnapshot snapshot :dataSnapshot.getChildren()){
                userModels.add(snapshot.getValue(UserModel.class));
            }
                notifyDataSetChanged();
            }
            @Override
            public void onCancelled(DatabaseError databaseError) {
            }
        });
    }
그리고 등록된 친구들의 정보를 모델로 불러올 땐
addValueEventListener의 onDataChange의 DataSnapShot.childern을 통해 불러올 수 있었다.
친구 창에서 자신을 제외하는 것은 for문 안에 if문으로 자신의 uid를 건너뛰어 제외하는 방식으로 하였다.
onBindViewHolder에서는 이미지 라이브러리 Glide를 사용해 프로필 이미지를 띄어주고 이름, 이메일을 구현했다.
친구 창에서 친구를 클릭 시 채팅창으로 넘어가는 것은
holder.itemView.setOnClickListener에서 intent.putExtra로 채팅창에서 사용할 친구의 uid를 넘겨주며 인텐트 하게 한다.
override fun onBindViewHolder(holder: CustomViewHolder, position: Int) {
    Glide.with(holder.itemView.context).load(friend[position].profileImageUrl)
        .apply(RequestOptions().circleCrop())
        .into(holder.imageView)
    holder.textView.text = friend[position].name
    holder.textViewEmail.text = friend[position].email

    holder.itemView.setOnClickListener{
        val intent = Intent(context, MessageActivity::class.java)
        intent.putExtra("destinationUid", friend[position].uid)
        context?.startActivity(intent)
    }
}
[작동]

[아쉬운 점]
더 효율적이고 직관적인 변수 선언이 개선되어야 한다.
'Android' 카테고리의 다른 글
| Kotlin, FireBase 채팅어플 만들기 -7- [프로필 변경_fragment] (2) | 2021.09.09 |
|---|---|
| Kotlin, FireBase 채팅어플 만들기 -6- [채팅 리스트_fragment] (0) | 2021.09.09 |
| Kotlin, FireBase 채팅어플 만들기 -4- [Bottom Navigation] (0) | 2021.09.04 |
| Kotlin, FireBase 채팅어플 만들기 -3- [Sign Up] (0) | 2021.09.02 |
| Kotlin, FireBase 채팅어플 만들기 -2- [Login] (0) | 2021.09.02 |


 오픈 채팅
오픈 채팅

댓글